
This build process creates a basic VMWare session with Debian Etch 2 Network Boot CD. Familiarity with VMWare is assumed. A similar configuration can be used when installing on physical hardware.
Monday, November 13. 2006
Debian Etch 2 Base Build
I'm posting this build process as it forms the basis for a number of other configurations that have already been posted, or will be posting in the near future. This configuration forms the basis of a network monitoring server that can be used to support a predominately Cisco based infrastructure.
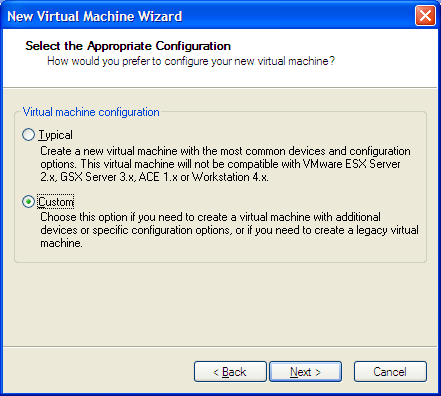
To create a VM, start the VMWare wizard with File -> New -> Virtual Machine. Use a 'Custom' Virtual Machine Configuration.
Select Next and then for an 'Appropriate Configuration', choose custom, then click 'Next'.
For a 'Virtual Machine Format', use 'New - Workstation 5'.
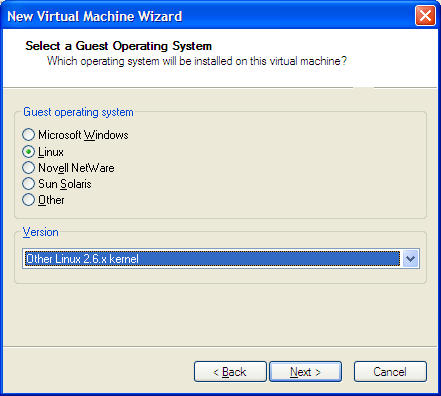
When you need to select a Guest Operating System, there is no entry for Debian. Therefore, in the radio button list, select 'Linux'. Then in the drop down box, select 'Other Linux 2.6.x kernel'.
In the next wizard window, provide a Virtual Machine name such as 'debbase'. Select an appropriate directory.
For 'Processor Configuration', select 'One' processor.
Default memory usage of 256 MB should be fine.
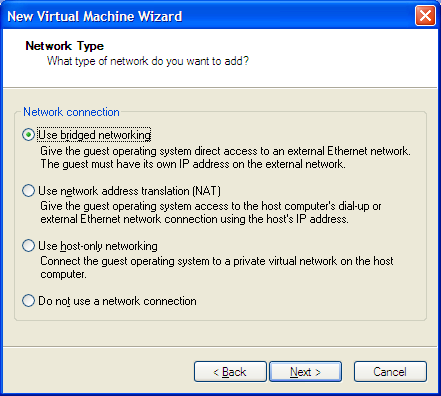
For the 'Network Type', typically you'd use 'Bridged Networking'. During operating system installation and configuration, you can then assign a dedicated IP address or allow the network DHCP to assign it an IP address.
On the 'Specify Disk Capacity' wizard window, the 8GB default disk size should be fine. Leave 'Allocate all disk space now' as blank. Optionally, you can select the 'Split disk into 2 GB files'.
When you need to specify 'Disk File', give it a name such as hda which is similar to the Linux physical drive vernacular.
Click 'Finish' to finish the VM session creation.
Operating System InstallationNow that the VM session has been created, the operating system can now be installed.
For the VM properties, you can point the virtual CD-ROM to a physical drive or to an .iso file on your harddrive. In either case, make the Debian Etch 2 NetInstall available and start the VM session. It should boot from you CD or .iso file.
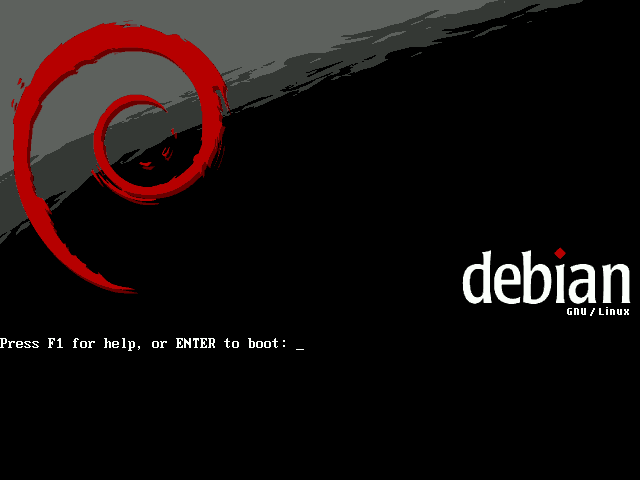
By default, the installation process will install Debian with Kernel 2.6, so just hit the ENTER key to start.
On the Language screen, hit enter to accept English.
On the country screen, choose Other, then select Bermuda (choose your own country here). This selection also sets the timezone, so be sure to choose appropriately, and hit ENTER.
For the Keyboard Layout, use American English and hit ENTER.
If you have a DHCP server, the installation process will automatically configure an IP address for your VM. If you had wanted to use a static IP address, either disable DHCP visability to the VM, or restart the installation and set the DHCP parameter to none (select F1 to find the appropriate screen with the parameter at the first installation screen.
For the hostname, use a name appropriate for the machine you'll be building. On the following screen, provide a domain name. For example: oneunified.net
You can then select a Debian Mirror from which to download the remaining packages for the installation. I normally use ftp.us.debian.org under the United States listed mirrors. You can skip or you can configure the http proxy information, as appropriate for your network access to the internet.
Installation will do a hardware scan and then start into drive partitioning.
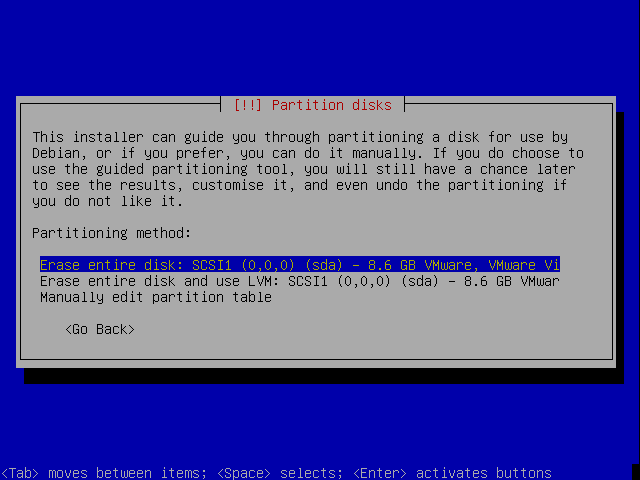
After choosing the default, you'll be presented with three choices for partitioning.
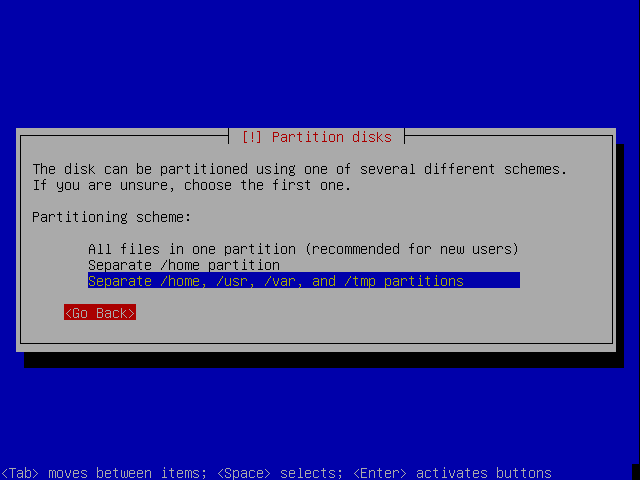
I don't use any of the defaults, so choose <Go Back> to get the main partiioning screen.

To partition the drive, use the following steps:
- On a system with dual drives using software raid:
- create a 200MB partition on each drive for the /boot partition
- set the boot flag on each partition
- the two partitions can then be joined in the raid manager as /dev/md0
- create a 500mb or 1gb partiion on each drive for the swap (normally I allow the swap partition to be managed by LVM, but as LVM will be residing on the raid'd partition, swap is maintained on the non-raid location to keep it fast)
- allocate the remaining space on each drive into a final partition which will be used by LVM
- join these two partitions together in the raid manager to become /dev/md1
- once created and the operating system is installed, 'mdadm --detail /dev/md0' can be used to view synchronization status
- once the raid partitions are in place, proceed with file system and LVM allocation (some of the following steps are redundant or are in need of adjustment [I'll have to reorganize this a little later] )
- select the drive and create new empty partition table (if you are not configuring with raid)
- select the free space and create a new partition of size 200MB, make it primary at the beginning, and the mount point should be /boot and set the 'Bootable Flag' to on.
- select the remaining free space, create a new partition, use the maximum space available, make it primary, use as 'physical volume for LVM', and don't make it bootable
- now start the 'Configure the Logical Volume Manager' selection, and select yes when asked to commit the current changes
- use the 'Modify volume groups' menu
- Create Volume Group
- use the space bar to select the shown volume group device
- call it 'vg01'
- use the 'Modify Logical Volumes' menu to create logical volumes
- Swap: lvSwap in vg01 of 500MB
- Base: lvBase in vg01 of 2GB
- Var: lvVar in vg01 of 1GB
- Netflow: lvNetflow in vg01 of 500MB
- leave logical volume creation and leave logical volume manager menu
- you'll see a listing with logical volumes and physical partitions, each needs to be assigned a mount point with the following steps... you'll select #1 under each indicated logical volume
- lvBase use as ext3 with mount point '/'
- lvNetflow use as ext3 with mount point of '/var/local/netflow'
- lvSwap use as swap area
- lvVar use as ext3 with mount point '/var'
- you can now Finish Partitioning and write changes
Additional Installation Steps:
- During the network install, a network card may not get recognized. If this is the case, try 'install noapic' on install boot. This worked on a IBM e300 server with an e100 network card.
- Set a password for the root account
- For the screen asking for a regular user account, create an account called 'admin' and provide it with a password
- For software selection screen, uncheck everything, then check:
- Web Server
- File Server
- SQL database
- Standard systems
- For the Samba Server configuration, put in your network domain name
- Choose Yes to install the GRUB boot loader to the master boot record.
- Allow the system to reboot
Log back in after reboot and install a few more modules:
- apt-get update
- apt-get upgrade
- apt-get install apt-file
- apt-get install ssh
- apt-get install ncftp
- apt-get install ntp
- apt-get install curl
- apt-get install lynx
- apt-get install expect
- apt-get install cvs
- apt-get install ntpdate
- apt-get install tcpdump
- apt-get install iperf
- apt-get install perl-doc
To synchronize the server time with NTP:
ntpdate servername|ipaddress
For some basic service management:
apt-get install sysv-rc-conf
sysv-rc-conf
Remove the AppleTalk protocol:
update-rc.d -f netatalk remove
apt-get remove netatalk
To search for packages:
apt-get install apt-file
apt-file update
apt-file -l list image
To install the default Perl CPAN bundle for the first time, accept all defaults. If your proxy or firewall does not accept ftp commands, modify the command around line 58 in '/usr/share/perl/5.8.8/CPAN.pm' so it uses an http site like:
$CPAN::Defaultsite ||= "http://cpan.calvin.edu/pub/CPAN"
That one will get the regular list of repositories downloaded. You can then choose one or more to your liking. http://cpan.belfry.net/ seems to be a good one.
perl -MCPAN -eshell
install PAR::Dist
install Compress::Zlib
install IO::Zlib
install Test::More
install Spiffy
install Test::Base
install Digest::SHA::PurePerl
install YAML
install Bundle::CPAN
reload cpan
install Error
install Digest::SHA1
install Digest::MD5
install DBI
If you choose a download site that doesn't work very well, use the following command and restart the perl configuration.
rm -rf /usr/lib/perl5/5.8.6/CPAN/Config.pm
Perform general configuration install generic utilities.
Uncomment certain commands in .bashrc or adding lines like:
#for regular proxying:
#http_proxy=http://username:password@proxy:8080/
#for ntlm proxying with APS098:
http_proxy=http://proxy:5865/
export http_proxy
Then reload the .bashrc file with:
#this command:
source .bashrc
#or this command
.bashrc
Install your .ssh key:
scp -r .ssh root@yourmachine:/root
Finally, if you are using VMWare, make a snapshot of the base build so it can be used as a basis for other servers, and can be rolled back when necessary.
From the command line, you can shutdown the server with:
Specific Server Prepatory Stepsshutdown -h now
After making a snapshop of the server, it can be renamed to the target. To do so, you'll need to change existing name in the following files to reflect the new name:
- /etc/hostname
- /etc/hosts
Make sure you have all the latest packages installed.
Make sure you've got the latest and most appropriate kernel for your machine. You can use:
apt-file -l search linux
to determine what the current image is. Install it with:
apt-get install linux-image-2.6.15-1-686
Mastershaper will require the source:
apt-get install linux-source-2.6.15
Trackbacks
Trackback specific URI for this entry
No Trackbacks
