Saturday, January 20. 2018
OpenGL Resources
From Khronos:
- OpenGL® and OpenGL® ES Reference Pages - text based documentation -
- OpenGL® 4.5 Reference Pages - from khronos
- Khronos OpenGL® Registry - contains specifications, header files, and related documentation for OpenGL and related APIs including GLU, GLX, and WGL (pdf based documentation)
- Getting Started
- Common Mistakes
- Reference Guides / Cards
- Interface Block (GLSL) is a group of GLSL input, output, uniform, or storage buffer variables. These blocks have special syntax and semantics that can be applied to them.
- Uniform (GLSL) is a global GLSL variable declared with the "uniform" storage qualifier. These act as parameters that the user of a shader program can pass to that program. They are stored in a program object.
- Main Wiki
- Texture Storage is the part of Texture objects that contains the actual pixel data stored in the texture
- Related toolkits and APIs: look at freeglut, glfw
- FreeGLUT version on github, with recent contributions for android
Other doc sites:
- docs.GL - describes API calls for es3, es2, gl2, gl3, gl4
- OpenGL.org
Book related:
- OpenGL SuperBible - sample code for the book, now 7th edition. Last blog entry from 2014.
- Vertex Array Performance - benchmarking from the SuperBible blog.
Tutorials:
- open.gl - the basics of using OpenGL to develop modern graphics applications, with good code samples.
- opengl tutorial - basic and intermediate
- TyphoonLabs' OpenGL Shading Language tutorials - pdf based documentation
- Official Guide to Learning OpenGL, Version 1.1 - with more links
- Learning Modern 3D Graphics Programming - download site - from Jason McKesson - pretty good - not online but via an archive.
- Song Ho Ahn - "fundamental OpenGL tutorials and notes. All example programs are written by C++ with Code::Blocks and Orwell Dev-C++, as well as makefiles for Linux and Mac. I mostly use GLUT"
Related libraries:
- OpenGL Mathematics (GLM) - is a header only C++ mathematics library for graphics software based on the OpenGL Shading Language (GLSL) specifications - Documentation
- Unofficial OpenGL Software Development Kit - is a collection of libraries and utilities that will help you get started working with OpenGL. It provides a unified, cross-platform build system to make compiling the disparate libraries easier. Image loader, mouse based camera/object manipulation, mesh manipulation, and related window support.
- OpenSceneGraph is an open source high performance 3D graphics toolkit, used by application developers in fields such as visual simulation, games, virtual reality, scientific visualization and modelling.
- NanoGUI - pure opengl user interface, just doesn't seem to be an easy way to get it on android.
Sunday, July 20. 2014
Building a Model in Blender From Multiple Photographs

There are a number of tutorials on youtube which explain the steps of creating a 3D model in Blender via the photogrammetry tools VisualSFM and MeshLab. I have distilled those instructions down to their basic elements via the following shortform guides.
An alternate dense point cloud builder: Clustering Views for Multi-view Stereo (CMVS) Continue reading "Building a Model in Blender From Multiple..." »
Friday, July 18. 2014
Creating Rainbow Backgrounds With Processing
I was creating some lighting effects for a dance recital. To break up the monotony of a monotonic cyc background, I wanted to create some simple color effects. As I've been wanting to, and have done so yet, I wanted to give processing 2 a go. It turns out to be a c-like language based upon an actual underlying java engine.
The program starts with a full screen rainbow. Then left clicking anywhere on the image, it uses the y value to determine the number of ripples, and the x value to determine the color upon which the ripples are centered. A right click will save the image to a file. Default image name is c000.jpg. The directory is hardcoded in the source. By typing a lower case 'c' then a sequence of digits, a new file name can be created. I used the letter 'c' to designate the cue for which the image was to be used. 'b' will toggle a black background in and out.
My plan was to use the Processing program during the light show, hence the use of midi to bring in images. The midi code is incomplete as I decided that show programming would become somewhat complex for what I needed. Rather than deleting the code, I have left the midi code in as a template for what could be done in the future. It is operational, and does trigger on midi messages, so it becomes a good working starting point for something different in the future.
While on the subject of Generative Art, some sites to which I'd like to return:
- Processing: the place for the application
- Wikpedia's entry for Generative Art
- zenbullets: prolific generative art producer
- Abandoned Art: art from zenbullets
- 25 life-saving tips for Processing
- Processing Wiki
- Processing, Midi, Renoise, Scripting
Continue reading "Creating Rainbow Backgrounds With Processing" »
Saturday, June 21. 2014
Texture Maps From Diffuse
Summary from Crydev Forum > Community > Tutorials > Texture Maps From Diffuse:
I was getting annoyed by generating normal map out of diffuses since they bend according to the color information I was getting unclean and plastic like normal maps ... This is useful if you want a really clean normal map and also the sad part it this tutorial works only for "some" diffuses, by "some" I mean the ones with simple surfaces.
Of course it works for all type of diffuse but that requires a digital pen and a lot of time to put in.
- Open it up in Photoshop (or other software).
- Make another layer on top of it, fill it with black and set the opacity to 50%.
- With the black layer activated you are now able to see the below layer which is our diffuse, now select the areas you want to bump up, and fill them with white color.
- Once you are done with it, set the opacity to 100% and save the image
- Save it and generate a normal map out of it.
- With the clean normal map, you can also simply generate a clean Specular map. (This if you NEED a clean specular, otherwise spec from original diff would be good).
- Remember to copy the black and white diffuse into the alpha channel and that'll simply be a Displacement map. (blur it according to your own surface type, rocks benefits from this, hard metal shapes probably not.).
- Specular maps shouldn't have strong AO or shadows in them, since when the light direction changes, it might look way off. Especially notable on the right-side (Opposite of the light direction) where the inwards-bending parts should be brighter than the surface itself. The normal-map should also contain some smaller details from the diffuse map, creating an more detailed outlook, you should try experimenting with creating an down-scaled normal layer and up-scaling it, blurring and overlaying on the main layer.
- Also, add a glossiness map to specular alpha, so that you can have dirty parts reflect light worse than clean parts.
Spanish Point Sunset
Sunday, June 8. 2014
The Sun Always Shines Above The Clouds
This is a picture shot last week of Commissioner's House in Dockyards, Bermuda from North Shore Road near Flatts. A little color enhancement, and some text were added.
Monday, May 26. 2014
KMPlayer, BenQ MH680, with 3D Glasses II
I recently purchased a BenQ MH680 projector. This projector is advertised as having 3D capabilities. I ordered at the 3D Glasses II to go along with it.
Having now received the glasses, I wanted to give it a try. Gravity, Hugo, and Avatar seemed to be good trial candidates. Gravity and Avatar I have as Side by Side, while I have Hugo as Over Under.
It took a while to figure out the correct settings, and to determine how to make things work. Here are my thoughts to help make things easier to configure next time.
For each of the two scenarios, side-by-side, and over-under, there are a couple of common KMPlayer settings. The right hand advertisement box can be made to go away by clicking on the 'box' slider in the upper header.
Right click in the main window to bring up a menu. In the '3D Screen Controls', set for 'Do Nothing'. Double Click to go full screen. Start playing the video. While playing the video, you should be aware of the following commands from the menu: 'Pan & Scan' -> 'Frame Size & Position'. These are handy keyboard keys to remember. They are used to tune the frame settings to optimize the 3D viewing environment.
width - ctrl 4 4 move left width + ctrl 6 6 move right height - ctrl 2 8 move up height + ctrl 8 2 move down
On the projector, bring up the 3D menu. Select 'Side By Side' or 'Over Under' as determined by the movie type. Then use the numeric keys mentioned earlier to tune the viewing experience. Especially if you are seeing double images.
If you see an inversion of depth, use the '3D Screen Controls' -> 'Swap Frame Order' menu item. These should provide the correct depth of view.
Sunday, May 25. 2014
Creating VJ Snippets
I'm looking at ways I could create various video snippets for Video Jockey. A Tilable Textures tutorial triggered some ideas. By using some blender models animated with randomness and texture mapped with gradient brushes would generate a number of interesting image sequences.
Having thought about this more, I remembered that Processing is designed to perform much of this real time visualization. Then I spot OpenProcessing. Perfect! Interactive ones are the best: Lines Between Letters.
Saturday, May 24. 2014
Blender Cycles Render Optimization
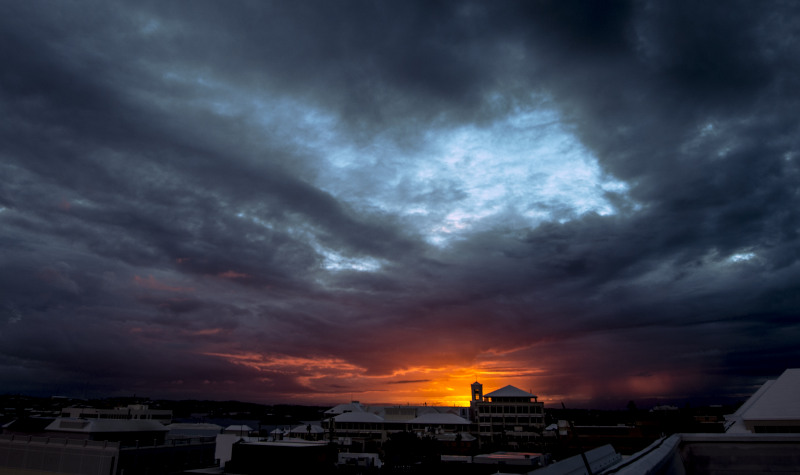
I created a three minute long Blender animation. This comes out to over 4000 frames at 24 frames per second. Per frame rendering was taking up to 90 seconds. This turns into about three days of rendering, even on a double NVidia Quaddro 4000. I wanted to see if I could improve the render times.
The first reference in the list is at Blender Guru - Four Easy Ways to Speed Up Cycles. His first listed method was to switch to GPU rendering. Yep, already selected that. And the latest Blender release, 2.70a, can use both of my GPUs. I see the two rendering tiles happening.
His second suggestion is to reduce the number of bounces. In his example, it looks like a high number of bounces are really useful for transparent objects, but less useful for solid objects. Looks like things could be toned down to 4 bounces or so, and still have a good render.
Changing tile size is the third optimization method. A setting of 256x240 (for 720p frame) appears to be helpful. That is for a GPU related render. It appears that smaller tile sizes work best for CPU based renders.
For high resolution renders, the number of samples needs to be high, but not excessively high. The law of diminishing returns comes into effect. For my render, I'm using 70 samples. The results are grainy, but very useful. Higher sample rates will increase render time.
In the comments section of the page, additional refinements are suggested: a) use a 'static bvh' viewport, b) save buffers, c) cache bvh, d) use spatial splits, e) persistent images, and f) progressive refine (other articles indicate that progressive refine is actually slower, I havn't tried it yet). [As a side note, the Adaptive Samples web site has many other useful Blender tips and techniques. Note, that on animation files with many frames, points b) and c) can eat a lot of disk space.
With a combination of these settings, I saw an improvement in render times from about 90 seconds down to 45 seconds, a 50% reduction in render time, and the images appeared to be of higher quality.
A subtle optimization of the tile size is mentioned at Adaptive Samples - Auto Tile Size Addon. The idea is to figure out what the tile size is for best renders based upon powers of two for x and y. Once determined, then modify the tile sizes for even distribution into the final render size. For example, if my tuned tile size is 256 x 256. My final render size is 720p (1280x720). So 1280/256=5. 720/256=2.8. So tile size would be 256x240. (256 goes evenly into 1280, but 3 is the closed integer which goes into 720 evenly).
As a side note, the blog Adaptive Samples has many additional Blender tips and techniques. One of which is some information about how to use the new Blender Volumetric lighting capabilities. Plus he has a series of Commonly Ignored Features.
Monday, May 19. 2014
Photo Recovery From SDCard
I bought, what I thought, would be a clever little dongle: a small USB device to accept SDCards and such. Must have been cheap, rather than inexpensive. I used it to transfer some files. I made the mistake of attempting to use it to delete files as well. Arrgh. It corrupted the file system. Arrgh. I tried a bunch of utilities. Things like GetBackData and such. They could find nary a thing.
A Q&A at StackFault gave a pointer to .... PhotoRec, a photo recovery tool.
The download is actually two applications: one is a file recovery tool, and the other is a photo recovery tool. The file recovery tool is what I tried first. It failed miserably. I thought I lost a whole evening's shooting for a band.
Later the day, in following links, I realized I hadn't tried the PhotoRec tool. I should have tried that first. It is totally amazing. It works by skipping the file system organization, and goes directly to scanning disk sector blocks. Photo files have signatures embedded in the file. The PhotoRec tool scans looking for those signatures, rebuilds the file, copies, and then places the file on a different drive.
It is still running while I write this, and still recovering files. I think I had around 700 files to review. Around 200 have been recovered so far.
Totally amazing. I think I need to do a donation for that one.
Lesson learned on this one: do a total read-only copy first, before going around and messing with files.
Sunday, May 18. 2014
Models, Materials and Textures For Blender
Models:
- Animium: Free 3D Models and 3D Tutorials, with Photoshop Brushes
- Blend Swap
- SciFi 3D
- 3D CAD Browser
- Blender 3D Model Repository
- 60 Excellent Free 3D Model Websites
- Render Textures: very good wood floors
- 3D Diva: free textures and architectural stuff
- Free Textures, Brushes, Patterns, and Design Articles: Looks good. Has some texture bundles.
- CG Textures
- Open Game Art
- Texturez
- Burning Well Textures
- Public Domain Pictures
- Ben Cloward Textures and other related tools and tutorials.
- CG Skies: source for high resolution panoramic HDR skies. Has links to additional HDR, panoramic, and stitching resources.
- Total Textures 19 DVD Bundle: non-free
- designrs hub: texture resources
- Photoshop Patterns
- Impressive Free High Resolution Textures and Backgrounds
- List of Free Texture Sites
- Texture X
Applications for height/displacement, normal, specular maps:
- Spiral Graphics Genetica: editor of seamless textures, animated textures, and HDRI environment maps! Genetica is a standalone application available on Windows XP and above. Found through a link at Textures With Genetica.
- Filter Forge: A plugin for Adobe Photoshop that allows you to build your own filters.
- StackExchange question, has a list of applications for texture map creation
- Blender Artists Evaluated Mapping Tools
- Crazy Bump: Create displacement, normal, specularity ... maps.
- Knald: After previewing it, this looks like it will be my goto application. Impressive what it can do with photographs.
- Gimp with a couple of add-ons: normalmap and Insane Bump. May only work in 32 bit mode. Insane Bump Updates may work on 64 bit systems, and may be faster. For some extra help: Texture Normal Map Tutorial in GIMP.
- ShaderMap 2: Create rendering maps in seconds.
- PixPlant: Great 3D Textures, Quickly. Has an additional feature of helping to create textures which can be tiled. If the tile mode had an edit mode associated with it, it would be terrific. As it is, the auto-tile function needs post processing to fix things up. But it certainly does a good first attempt and seemless tiles.
- MaPZone 2.6, which looks like it hasn't been updated in a while, and a bunch of links are broken. The company looks to have evolved into more substantial products called their Substance Pack. Tony Textures xNormal: Bakes Your Maps
Tutorials:
- How to Create a Seamless Concrete Texture & Thea Render Materialj
- How to generate a displacement map for a tilable texture with Blender
- Creating Realistic Materials for Blender Projects
- The Secrets of Realistic Texturing
- Create Texture Maps in Gimp
- Tiling Texture Maps with Offset: a good tutorial showing: a) how to cut out regions, paste them, and use eraser to blend the edges, which I used for fixing tiling seams and obvious repeats, b) using a second picture of twice the dimensions, and using pattern-define on the first image, then image fill on second image to check tiling results.
Notes:
- Add a glossiness map to specular alpha, so that you can have dirty parts reflect light worse than clean parts.
- Manual normal map: a) open image in image editor, b) make another layer on top, fill with black, and set opacity to 50%, c) with black layer activated, fill the areas you want to bump up with white, d) grey the transitions appropriately, e) set opacity to 100% and save image, f) generate normal map, g) b/w image can be used for displacement.
- From David Hier: to remove the seams, I find that the least destructive method is to copy sections of the texture to new layers and erase the edges to blend everything together. You can also use the heal, patch or clone tools if you prefer, but I find that they can create too many artifacts. Try flipping your copied sections in both directions to avoid obvious repetitions.
Sunday, May 11. 2014
Free Graphics Tools
Here are some reasonable free graphics tools. A larger list can be seen at Libre Graphics Meeting 2014 Leipzig.
- irfanview: is a very fast, small, compact and innovative FREEWARE (for non-commercial use) graphic viewer (MS Windows only)
- darktable: is an open source photography workflow application and RAW developer. A virtual lighttable and darkroom for photographers. It manages your digital negatives in a database, lets you view them through a zoomable light-table and enables you to develop raw images and enhance them. Said to be better than Adobe LightRoom. Runs on MacOSX and Linux.
- Entagle: provides a graphical interface for “tethered shooting”, aka taking photographs with a digital camera completely controlled from the computer.
- Inkscape: is professional quality vector graphics software which runs on Windows, Mac OS X and Linux. It is used by design professionals and hobbyists worldwide, for creating a wide variety of graphics such as illustrations, icons, logos, diagrams, maps and web graphics.
- Open Font Library: promotes your freedoms as it relates to the use of type. All the fonts that appear on this site come with the freedom to use, study, share and remix them.
- Font Squirrel: Free fonts have met their match. We know how hard it is to find quality freeware that is licensed for commercial work. We've done the hard work, hand-selecting these typefaces and presenting them in an easy-to-use format.
- Scribus: is an Open Source program that brings professional page layout to Linux, BSD UNIX, Solaris, OpenIndiana, GNU/Hurd, Mac OS X, OS/2 Warp 4, eComStation, and Windows desktops with a combination of press-ready output and new approaches to page design.
- GiMP: is a freely distributed piece of software for such tasks as photo retouching, image composition and image authoring. It works on many operating systems, in many languages. It is designed to be augmented with plug-ins and extensions to do just about anything. The advanced scripting interface allows everything from the simplest task to the most complex image manipulation procedures to be easily scripted.